
I am so excited to share our most recent weekend project with y’all! Now that we’re totally moved in and as settled as we can get in our new home, the projects have begun. I am a huge fan of Fixer Upper (Joanna can I have your job please!?) and swoon every time they flip an older home with ship lap walls. I knew when we bought our home at least one room had to have ship lap. I spent a lot of time researching the best way to get the look. I didn’t want to have to take our molding/baseboards off or get into our dry wall (people have done it!). Yes I wanted an easier way, but did not want to sacrifice the quality look. And friends, I have the solution. Did I mention we did it for under $100? Follow our little ship lap journey below!
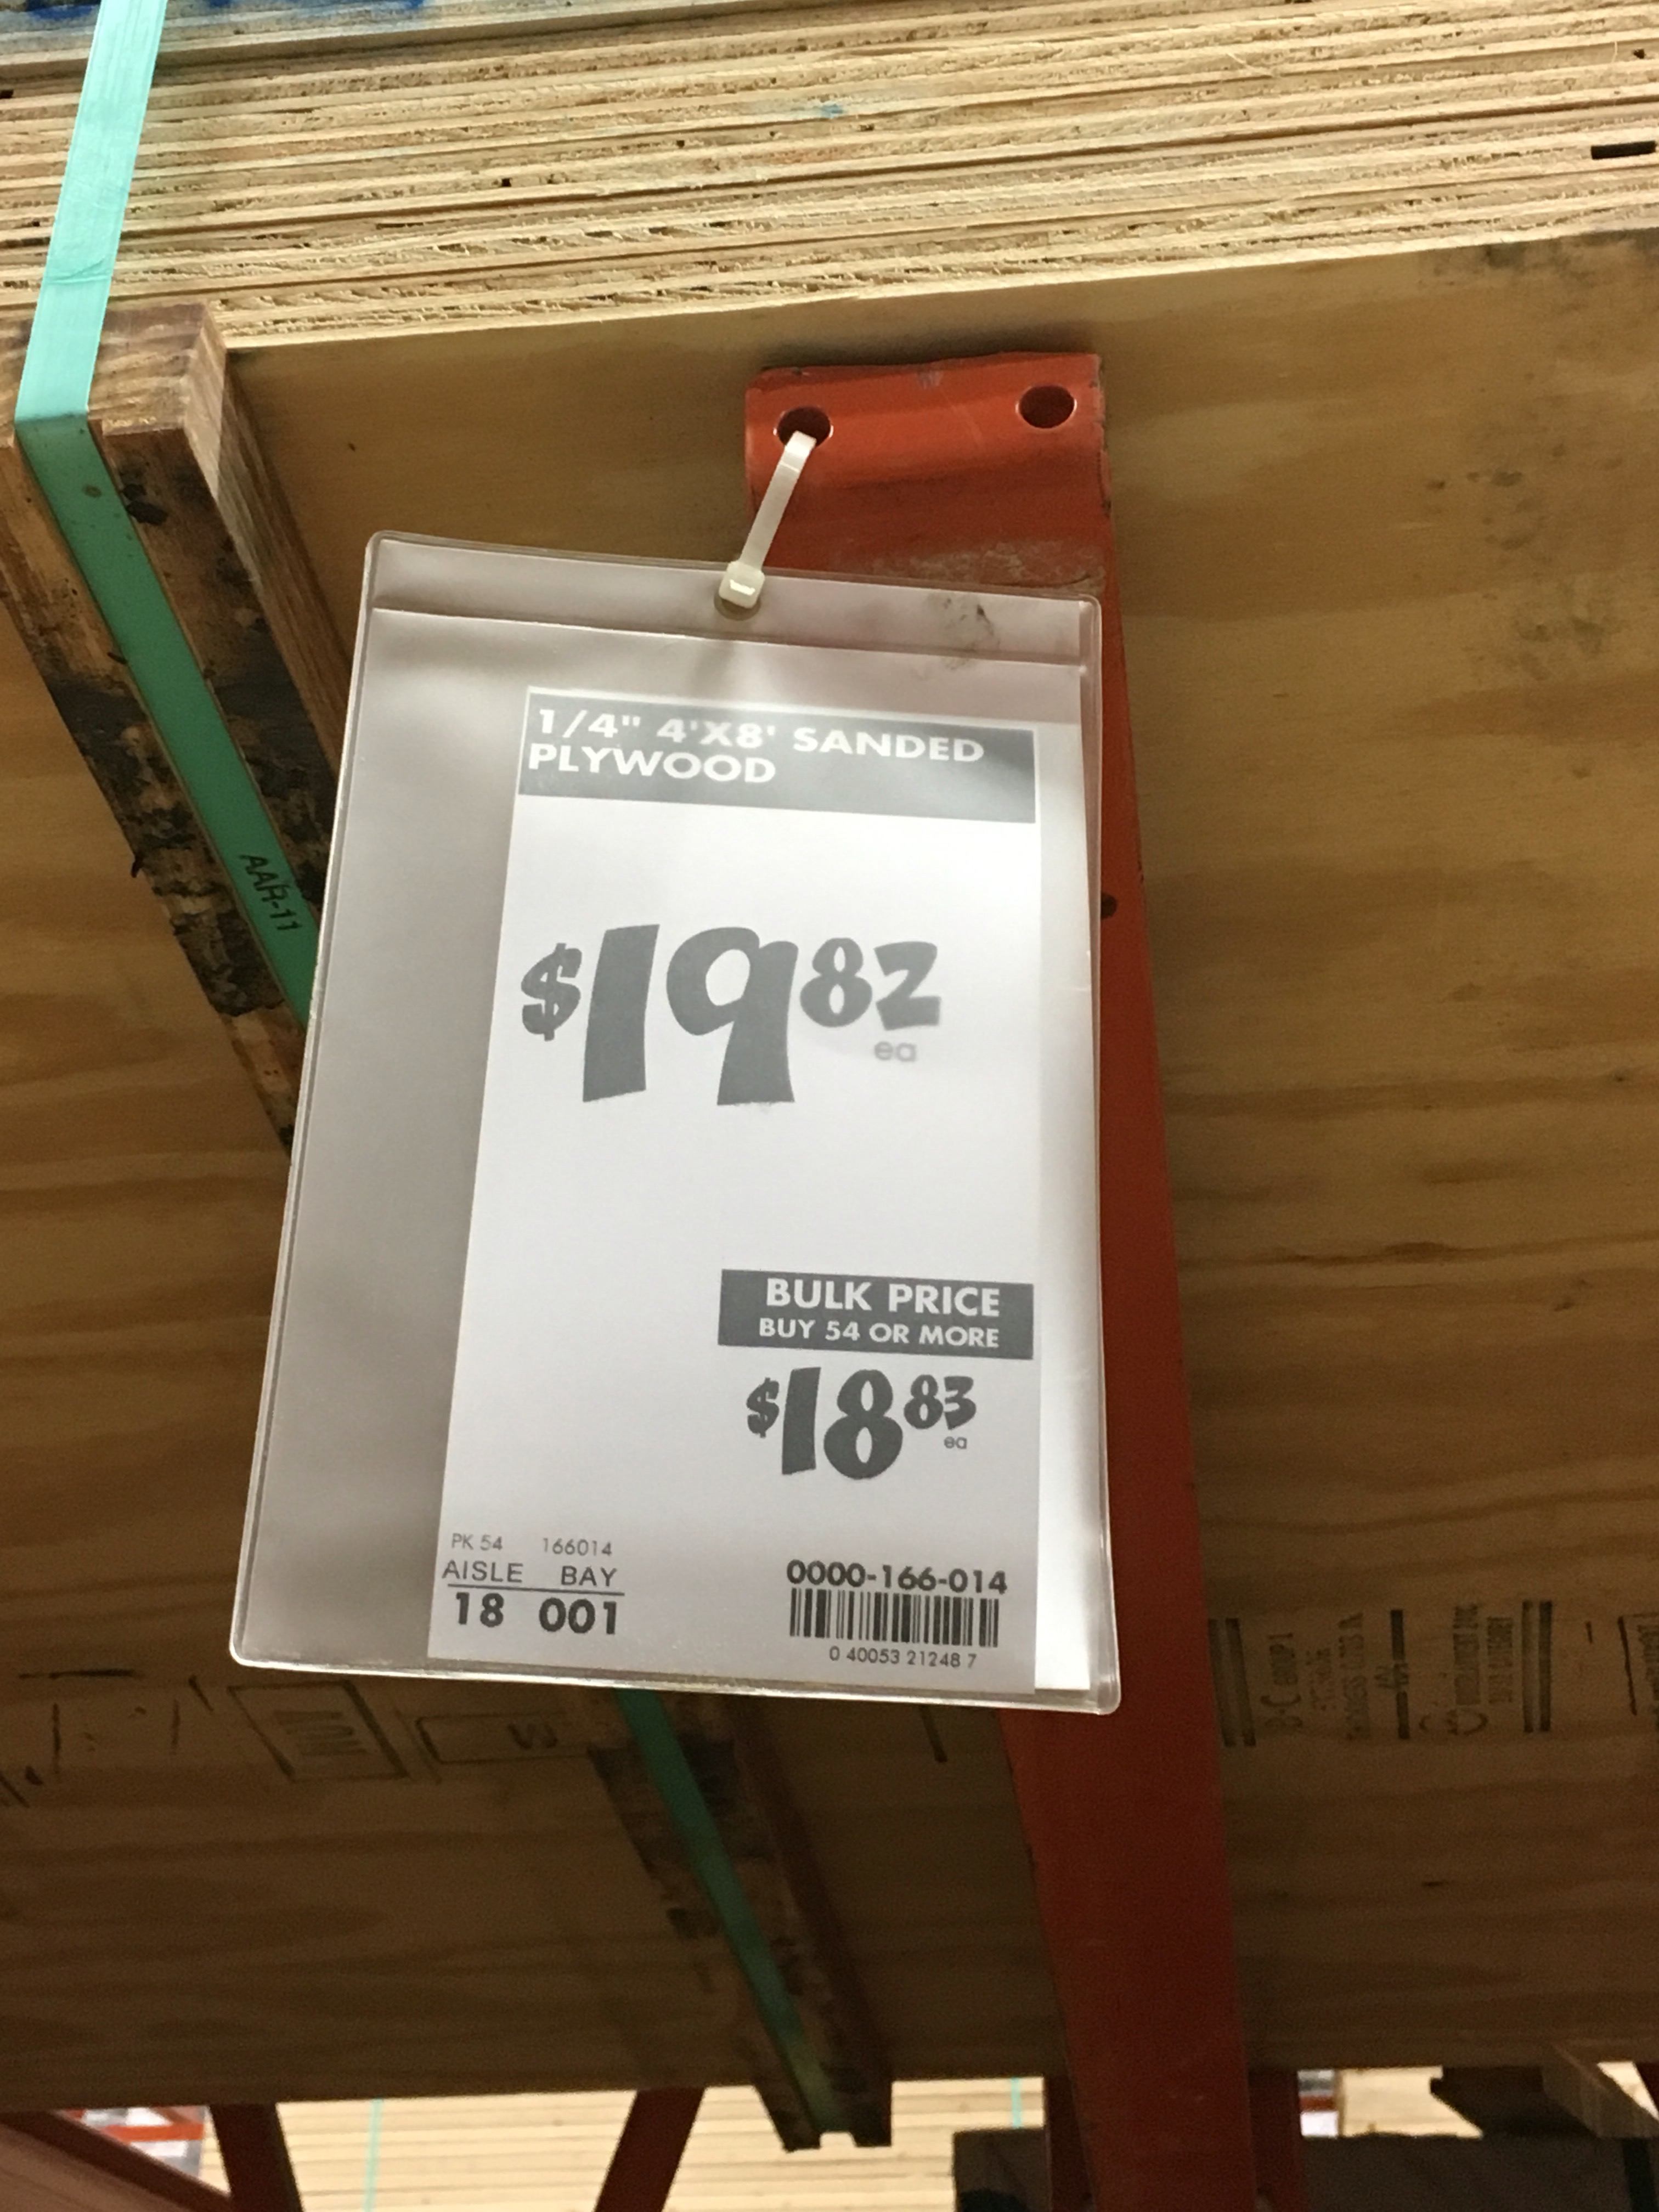
We headed to Home Depot and bought 4 sheets of 1/4″ 4×8 Sanded Plywood. We had a very nice man cut all 4 sheets into 8 inch planks for us (long ways). I’ve heard they charge a small cutting fee, but we were not charged for one (score!). Here’s the great thing about this 1/4″ plywood-it’s really thin so your molding/baseboards will still stick out enough from your wall, and not look flush. *Tip* If you have darker walls, paint your walls white first (or color you are painting ship lap), the spaces in between the planks are small and you will have to use a small (art) paint brush, regular paintbrushes will be to thick to fit in between the planks. If you have lighter walls-it should be okay, just personal preference. We had light gray walls and did not paint first and I think it turned out great!


Cut planks to fit your wall. We ended up cutting pieces in various lengths to give the impression of a ‘planked’ wall because our kitchen dining walls are shorter. If you are hanging ship lap on a larger wall, you’ll have less cutting time! I used two stacked pennies in between each plank as spacers. We also used a nail gun, this will save SO much time. *Another Tip* Be aware of the planks you are hanging. Plywood is not perfectly straight and it doesn’t matter what you do-some pieces will be wider than others. It’s like a puzzle-try a piece before you nail in!


Now that your planks are hung-it’s time to paint! We chose a matte white for a fresh, clean look (took two coats). You can use any color and still make a statement!
Because we ended our ship lap on the corners of our walls, we left a one inch gap to put up a trim to give our walls and corners a finished look. We also bought our trim at Home Depot. It is 1/4″ thick so it matches perfectly to our plywood planks and it fit the one inch gap we left to finish off our walls. I think we spent just under $5 for the trim! *One More Tip* You’re lucky if all of your planks fit together perfectly from ceiling to baseboards. As you can see we have a couple of odd spaces above our doors. We used a piece of our trim to fill this space; instead of trying to cut an 8ft plank to fit a one inch wide strip.

Currently, this is the before (listing photo), before ship lap and after of our kitchen dining area! We are still on the hunt for a round table but for now-we LOVE it! I’ll update when we find the perfect furniture for our gathering place.


I’m a Chip and Joanna Gaines fan too. Love the ship lap! Great job!